Water Damage • Pipe Burst
What to Do Immediately After a Pipe Bursts in Your Home
A burst pipe can release hundreds of gallons of water in a short time. Knowing what to do in the first minutes can limit the damage and protect your home from much larger structural problems.
A pipe burst is one of the most common causes of sudden water damage inside a home. It often happens without warning and can quickly flood floors, walls, and ceilings. The faster the response, the better the chances of limiting structural damage and preventing long term moisture problems.
Many homeowners feel overwhelmed when water starts pouring into the house. The key is not panic but taking the right steps in the right order. Acting quickly can reduce repair costs and prevent hidden moisture from spreading into surrounding materials.
If the situation is already causing flooding or spreading water through the home, the safest first step is contacting a professional water damage restoration service in Charlotte NC that can stop the spread and begin the drying process immediately.
Why pipes burst inside homes
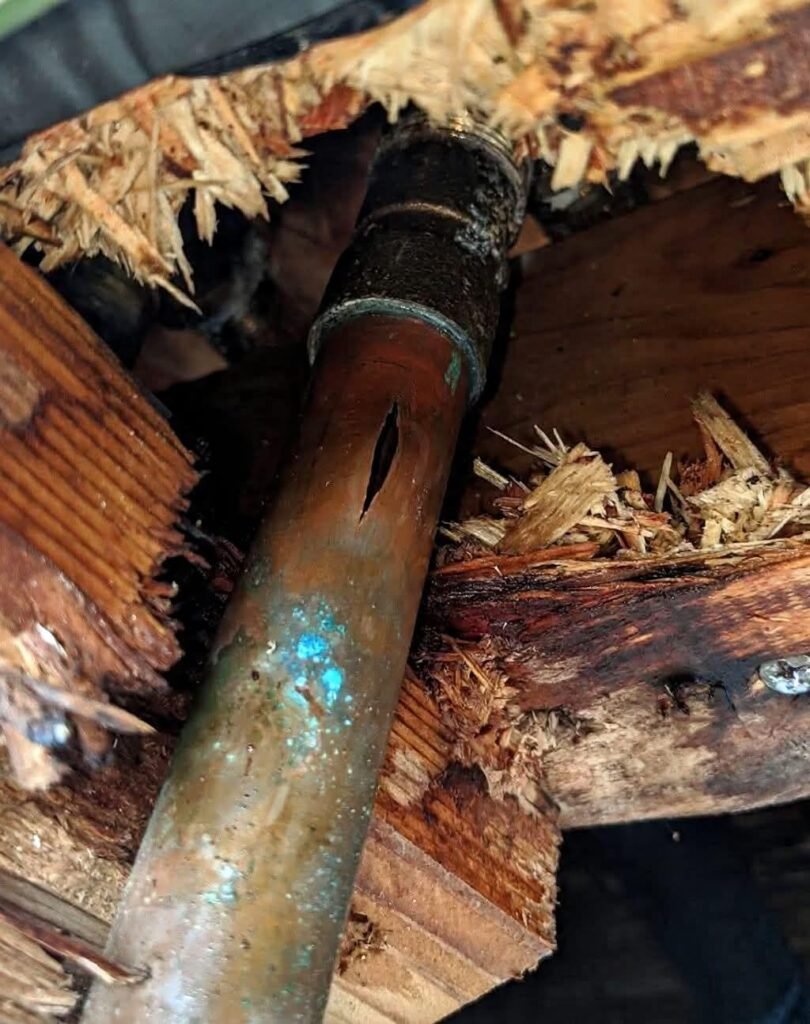
Pipes usually fail because of pressure changes, freezing temperatures, corrosion, or aging plumbing materials. When a pipe bursts, water does not just stay where the leak begins. It spreads through floors, wall cavities, insulation, and framing before it becomes visible.
Common causes of pipe bursts include:
- Frozen pipes expanding during winter
- Old plumbing materials weakening over time
- High water pressure inside the system
- Loose fittings or failing pipe connections
- Accidental damage during repairs or renovations
In many cases the leak may start slowly and then suddenly rupture, releasing a large amount of water into the structure.
Step one: shut off the water supply
The most important step is stopping the flow of water. Locate the main shutoff valve for the home and turn it off immediately. This valve is often located near the water meter, in a basement, crawlspace, garage, or utility area.
Once the supply is off, open faucets in the home to relieve pressure remaining in the pipes. This helps reduce additional leaking while the system is inspected.
Step two: protect the surrounding area
If water is spreading across floors or leaking through ceilings, try to move furniture, electronics, and personal belongings away from the affected area. Even small leaks can quickly damage flooring, drywall, and cabinets.
Water often spreads further than homeowners expect. Moisture can travel through:
- Drywall and wall cavities
- Flooring and subfloor materials
- Insulation behind walls
- Ceiling spaces below the leak
This is why many water losses later involve mold remediation and moisture removal if the drying process is delayed.
Step three: document the damage
Before major cleanup begins, take photos and videos of the affected areas. Capture where the water originated, the damaged materials, and the spread of moisture throughout the home. This documentation can be important if an insurance claim is involved.
Early documentation helps demonstrate the source of the loss and the extent of the damage before repairs or demolition begin.
Many homeowners also request a professional inspection to evaluate hidden moisture and provide documentation for the claim. You can schedule that directly through the inspection request page.
Step four: remove standing water
Standing water should be removed as soon as possible if the area is safe. Wet vacuums, pumps, or extraction equipment can help remove the bulk of the water from floors and surfaces.
However, removing visible water is only the beginning. Water often penetrates materials like drywall and subflooring where it cannot be seen. If those materials remain wet, the damage continues even after the surface appears dry.
Water damage does not stop once the water disappears. Moisture trapped inside materials can continue damaging the structure if drying is incomplete.
Step five: begin structural drying
Professional drying uses a combination of extraction equipment, air movement, and dehumidification to remove moisture from building materials. The process often involves moisture meters and monitoring to verify that the structure is drying properly.
This is closely connected to what happens during structural drying and emergency mitigation, where equipment is placed strategically to remove moisture from walls, flooring, and surrounding areas.
Preventing mold after a burst pipe
One of the biggest risks after a pipe burst is mold growth. Mold spores already exist inside homes and only need moisture and organic material to begin spreading. According to the EPA mold guidance, mold can begin developing within one to two days when materials remain wet.
Quick drying and moisture removal significantly reduce this risk and help protect indoor air quality.
Final thought
A burst pipe may seem like a simple plumbing problem, but it can quickly turn into a structural water damage issue if the moisture spreads into walls, flooring, and insulation. The sooner the water source is stopped and the drying process begins, the better the outcome for the property.
Acting quickly, documenting the damage, and beginning proper drying are the most important steps homeowners can take in the first hours after the incident.
Need help after a pipe burst?
Emergency Restoration Team provides 24/7 emergency response for pipe burst water damage, structural drying, and restoration support across the greater Charlotte area.
24/7 Emergency Restoration Team (704)525-4552
Chat with our experts anytime (704)741-4721